
Spider Plants UK:Spider plant (Chlorophytum comosum) is a fast-growing, low-maintenance houseplant native to Southern Africa, widely recognised by its long, arching green-and-white striped leaves and the small plantlets — called spiderettes — that dangle from trailing stems like tiny spiders on a web.Spider plants are found in more UK homes than almost any other houseplant.Walk through any British city — peer into bay windows in Manchester, bathroom shelves in Edinburgh, kitchen windowsills in Bristol — and you will almost certainly spot that familiar fountain of striped leaves.
They were the defining houseplant of the 1970s, faded quietly from fashion in the 1990s, and have roared back into popularity on the back of the 2020s houseplant revival, championed by a new generation of plant parents who value both beauty and resilience.Their enduring appeal is simple: they are extraordinarily forgiving. They survive neglect, adapt to low light, produce free plants endlessly, are safe around pets and children, and ask almost nothing in return for years of attractive growth.
For new plant parents, they are the perfect starting point. For experienced collectors, they remain a practical and rewarding staple.This guide is the most comprehensive spider plant resource written specifically for UK growers.
It covers everything the top-ranking pages miss — UK-specific water quality advice, a month-by-month seasonal care calendar, an in-depth variety guide, a step-by-step propagation walkthrough, a full troubleshooting section, and a detailed room-by-room placement guide for typical British homes.Whether you have just brought your first spider plant home from Aldi or have been growing them for decades, this guide has something new for you.
What Is a Spider Plant? Origins, Botany & History
The spider plant’s scientific name is Chlorophytum comosum, belonging to the family Asparagaceae. The genus name Chlorophytum comes from the Greek words for “green plant,” and comosum means “tufted” — a reference to the clustered leaf growth habit.
Taxonomy at a glance:
| Classification | Detail |
|---|---|
| Kingdom | Plantae |
| Family | Asparagaceae |
| Genus | Chlorophytum |
| Species | C. comosum |
| Native range | Southern and tropical Africa |
| Growth type | Herbaceous perennial |
| Root type | Fleshy, tuberous — stores water and nutrients |
Where Do Spider Plants Come From?
Spider plants are native to the coastal regions and open forests of South Africa, Zimbabwe, and other parts of tropical and subtropical Africa. In their natural habitat, they grow on rocky slopes and in forest undergrowth, sheltered from direct sunlight by the tree canopy above. This natural semi-shade existence explains why they thrive so well in the indirect light conditions typical of UK homes.
In the wild, spider plants experience distinct seasons — active growth in warm, wet months and a period of semi-dormancy during cooler, drier conditions. This mirrors the UK’s seasonal rhythm almost exactly, which is why a spider plant’s care requirements shift naturally between spring/summer and autumn/winter.
Why Are They Called Spider Plants?
The name comes from the small plantlets produced on long, trailing stems after the plant flowers. These offsets — called spiderettes — dangle from the mother plant on wiry stolons, resembling spiders suspended on a web. Other common UK names include:
Ribbon plant — for the long, ribbon-like leaves
Airplane plant — for the way spiderettes appear to “take off” on their stems
Hen and chickens — a traditional British name referring to the mother plant and its many offspring
Spider ivy — for the cascading, ivy-like growth habit
The Cultural History of Spider Plants in the UK
The 1970s houseplant boom: Spider plants became a British cultural fixture during the 1970s houseplant craze, a period when exotic indoor greenery became widely affordable and aspirational. They appeared in living rooms, offices, and hallways across the country, often displayed in hanging macramé baskets — the design aesthetic of the era.
The 1990s decline: As interior design moved toward minimalism and clean lines in the 1990s and early 2000s, spider plants were quietly set aside. They came to be seen as “your nan’s plant” — charming but dated.
The 2020s revival: The COVID-19 lockdowns of 2020–2021 triggered an extraordinary surge in UK houseplant sales. People stuck at home turned to indoor plants for connection with nature, wellbeing, and creative expression. Spider plants rode this wave enthusiastically, celebrated for their ease, propagation potential, and — critically — their 70s retro aesthetic, which has been firmly back in style since 2022. ITV’s This Morning and British garden media have documented the spider plant’s return, and social media plant communities have embraced it as both a beginner’s essential and a nostalgic icon.
Spider Plant Varieties Available in the UK
How Many Types of Spider Plant Are There?
There are several distinct cultivars of Chlorophytum comosum available in the UK, differing primarily in their leaf variegation pattern, growth habit, and size. Understanding which variety you have helps you tailor its care and display.
The most widely grown spider plants in the UK belong to three main cultivars, plus a closely related species gaining popularity in specialist retailers.
Chlorophytum comosum ‘Vittatum’ (Most Common UK Variety)
What it looks like: Green leaves with a central white or cream stripe running down the middle. Leaves arch outward in a fountain shape and can reach 30–45cm in length.
Availability in the UK: The most widely available variety. Found in Aldi, Lidl, Tesco, B&Q, Dobbies, and most supermarkets.
Best for: Absolute beginners; budget buyers; first-time houseplant owners.
Care notes: Slightly slower growing than Variegatum. The central stripe fades in low light — move to a brighter windowsill if the variegation dulls.
Chlorophytum comosum ‘Variegatum’ (Reverse Variegated)
What it looks like: The colour pattern is reversed compared to Vittatum — green centre with white or cream edges along the margins of each leaf. Slightly more compact.
Availability in the UK: Common in garden centres and online retailers; less frequent in supermarkets.
Best for: Shelf or windowsill display; slightly more architectural look than Vittatum.
Care notes: Very similar care to Vittatum. The marginal variegation is more prone to fading in poor light.
Chlorophytum comosum ‘Bonnie’ (Curly Spider Plant)
What it looks like: Leaves curl and spiral rather than growing straight — a compact, quirky habit. Produces the same trailing spiderettes as other varieties.
Availability in the UK: Less common; primarily available from specialist online retailers: Patch Plants, Beards & Daisies, Happy Houseplants, Crocus.
Best for: Small spaces, desks, compact shelves; excellent gift plant.
Care notes: Identical care requirements to other cultivars. The curling leaves can trap dust more easily — rinse monthly under the shower.
Chlorophytum comosum (Solid Green, Non-Variegated)
What it looks like: Plain, solid mid-green leaves with no striping or variegation.
Availability in the UK: Rare in mainstream retail; occasionally found at specialist nurseries, RHS plant fairs, and some independent garden centres.
Best for: Very low-light rooms where variegated types would lose their colouration; a more dramatic, lush look.
Care notes: Arguably the most robust of all cultivars — adapts better to darker conditions than variegated forms.
Chlorophytum orchidastrum ‘Green Orange’ (Orange Spider Plant)
What it looks like: Technically a different but closely related species. Broader, darker green leaves with striking orange-red leaf stems (petioles). Does not produce the dangling spiderettes of C. comosum.
Availability in the UK: Growing in availability since 2023; sold by Patch Plants, Crocus, and some specialist nurseries.
Best for: Bold, contemporary interiors; plant collectors; those wanting something unusual.
Care notes: Prefers slightly more warmth and humidity than standard spider plants. Care is broadly similar but give it a slightly warmer spot — avoid rooms below 15°C in winter.
Spider Plant Varieties Comparison Table
| Variety | Leaf Pattern | Size | UK Availability | Spiderettes? | Best Feature |
|---|---|---|---|---|---|
| ‘Vittatum’ | Green with white centre | Medium | ★★★★★ | Yes | Most common, easiest to find |
| ‘Variegatum’ | White edges, green centre | Medium-compact | ★★★★ | Yes | Elegant, reverse colouring |
| ‘Bonnie’ | Curly/wavy, variegated | Compact | ★★★ | Yes | Unique texture, small spaces |
| Solid green | Plain green | Medium-large | ★★ | Yes | Best for low-light rooms |
| orchidastrum | Green with orange stems | Medium | ★★★ | No | Bold contemporary look |
Where to Buy Spider Plants in UK: 2026 Guide
What to check when buying:
Roots: a few white/cream roots visible at drainage holes = healthy. Masses of tightly packed brown roots = pot-bound and stressed.
Leaves: firm, upright, good colour. Avoid drooping, yellowing, or brown-tipped plants.Pests: check under leaves and in the leaf axils for signs of mealybugs (white fluff) or spider mites (fine webbing).
Compost: should be lightly moist, not bone dry or soggy.
UK retailers by type:
| Retailer | Best for | Varieties Available | Approx. Price (2026) |
|---|---|---|---|
| Aldi / Lidl | Budget buys, impulse purchase | Vittatum (seasonal) | £2–£4 |
| Tesco / M&S | Convenient, reliable quality | Vittatum | £4–£8 |
| B&Q / Homebase | Good range, in-store advice | Vittatum, Variegatum | £5–£10 |
| Dobbies / RHS shops | Quality, healthy stock | Vittatum, Variegatum | £6–£15 |
| Patch Plants (online) | Wide variety, expert packing | Vittatum, Variegatum, Bonnie | £8–£18 |
| Beards & Daisies (online) | Premium stock, gift-ready | Vittatum, Variegatum, Bonnie | £10–£22 |
| Happy Houseplants (online) | Specialist selection | Multiple cultivars | £8–£20 |
| Crocus (online) | RHS-affiliated, trusted | Vittatum, Variegatum, orchidastrum | £8–£25 |
| Local plant swaps / Facebook | Free | Spiderettes from local growers | Free |
Pro tip: Spider plants propagate so freely that many UK Facebook Marketplace groups, Nextdoor communities, and local plant swap events offer free spiderettes. If you know anyone with a thriving spider plant, they will almost certainly give you babies for nothing.
Complete Spider Plant Care Guide for UK Growers
How Do You Care for a Spider Plant in the UK?
Spider plants need bright, indirect light; watering when the top third of soil dries out (using rainwater or stood tap water); temperatures between 13–24°C; peat-free houseplant compost; and feeding every 10–14 days from March to September. The single most UK-specific care consideration is water quality — British tap water contains fluoride and chlorine that gradually damage spider plants over time.
Light: What Light Does a Spider Plant Need?
Definition: Spider plants prefer bright, indirect light — meaning a well-lit room where sunlight reaches the plant without direct sun rays hitting the leaves.
Ideal placement: An east- or west-facing windowsill, where the plant receives gentle morning or evening sun but is shielded from the intense midday rays of a south-facing window.
Light tolerance range:
Best: Bright, indirect light — east or west windowsill
Acceptable: Medium indirect light — north-facing rooms, hallways
Avoid: Direct midday sun — south-facing windows without a sheer net curtain
What happens in too little light:
- Leaves lose their variegation — white stripes fade to pale green
- Leaves lose their variegation — white stripes fade to pale green
- Growth slows significantly
- Spiderettes and runners stop forming
- Leaves become limp and pale
What happens in too much light:
- Leaves develop bleached, washed-out patches
- Brown tips appear from the centre outward (distinct from fluoride tip burn, which starts at the very leaf tip)
- Leaf scorch: tan or papery patches on leaves facing the sun directly
UK seasonal note: British winter light (November–February) is significantly weaker than summer light, even on south-facing windowsills. Move your spider plant to the brightest available spot in the house from October onwards. A plant that thrived on a north-facing sill in summer may need a better-lit position in winter to avoid leaf fade.
Grow light option: If your home is very dark in winter, a simple LED grow light set to run for 12–14 hours per day will maintain healthy growth. This is especially useful for north-facing flats common in UK cities.
Watering: How Often Should You Water a Spider Plant in the UK?
Spider plants should be watered when the top third of their compost (roughly 3–5cm deep) has dried out. They store water in their thick, tuberous roots and will always recover better from slight underwatering than from overwatering.
Watering frequency guide:
| Season | Frequency | Soil Check |
|---|---|---|
| Spring (March–May) | Every 7–10 days | Top 3cm dry |
| Summer (June–August) | Every 5–7 days | Top 3cm dry |
| Autumn (September–November) | Every 10–14 days | Top half dry |
| Winter (December–February) | Every 14–21 days | Top two-thirds dry |
How to check: Push your finger 3–4cm into the compost. If it feels moist and cool, wait. If it feels dry and crumbly, water now.
The UK Tap Water Problem: Why You Should Not Water Spider Plants Straight From the Tap
This is the most important UK-specific care point that most guides fail to explain properly.
What is the problem? UK tap water is treated with fluoride (to protect dental health) and chlorine (to kill bacteria). Both chemicals accumulate in the compost over time and are toxic to spider plants in high concentrations. Fluoride damages leaf tissue by disrupting photosynthesis, causing the characteristic brown tips that most UK spider plant owners see and cannot explain. Chlorine causes similar — though slightly less severe — damage.
Hard water areas (London, the South East, East Anglia, East Midlands) add a third problem: high calcium and magnesium mineral content, which creates white crusty deposits on leaves and compost surfaces and gradually affects root health.
UK water hardness by region:
| Region | Water Type | Risk to Spider Plants |
|---|---|---|
| London / Southeast | Very hard | High — fluoride + high minerals |
| East Anglia | Hard | High |
| East Midlands | Moderately hard | Moderate–High |
| Northwest England | Soft (Pennines) | Low–Moderate |
| Wales | Very soft | Low |
| Scotland (most areas) | Soft | Low |
| Southwest England | Variable | Moderate |
Spider plants UK watering tips:
- Collect rainwater — the gold standard. Free, naturally soft, fluoride-free. Keep a small watering can on a windowsill to collect from an open window or balcony during UK rain.
- Use a Brita-style filtered jug — removes chlorine and most heavy metals. Does not fully remove fluoride but significantly reduces it.
- Stand tap water for 24 hours — allows chlorine to dissipate naturally. Note: this does NOT remove fluoride. Better than nothing, but rainwater is far superior.
- Use aquarium dechlorinator (e.g., Seachem Prime) — removes chlorine, chloramine, and heavy metals. Inexpensive and highly effective. Add a few drops to a watering can of tap water.
- Flush the soil quarterly — run several litres of rainwater or filtered water through the pot and allow it to drain completely. This flushes out accumulated mineral salts.
Always use tepid water — cold water straight from the tap shocks the roots. If the water would be uncomfortable for your teeth, it is too cold for the plant.
Temperature: What Temperature Do Spider Plants Need in the UK?
Definition: Spider plants prefer temperatures between 13°C and 24°C — a range that suits virtually every heated room in a typical UK home.
Temperature guidelines:
| Condition | Temperature | Effect |
|---|---|---|
| Ideal growing range | 13–24°C | Active, healthy growth |
| Acceptable minimum (winter) | 8–12°C | Growth slows; plant enters semi-dormancy |
| Danger threshold | Below 8°C | Leaf damage, collapse, potential death |
| Too hot | Above 27°C | Stress; leaves thin and leggy; more prone to pests |
UK-specific temperature hazards:
- Conservatories in winter: Unheated conservatories in the UK frequently drop below 5°C from November to March. Move plants inside before the clocks change in October.
- Cold windowsills: The glass surface of UK double-glazed windows can radiate cold in winter. If your windowsill feels cold to the touch, move the plant a few centimetres back from the glass.
- Draughts: UK Victorian and Edwardian houses (a huge proportion of British housing stock) have draughty windows and doors. Keep spider plants away from these cold air streams.
- Central heating: UK homes typically run central heating from October to April. Radiators create warm dry air — this is not a problem for temperature, but it reduces humidity (see next section).
Can I put my spider plant outside in summer?
Yes — spider plants can be moved to a sheltered outdoor position (a patio, balcony, or garden) from June to August, when UK temperatures are reliably above 10°C at night. Place in a spot with dappled shade or morning sun. Bring back inside before mid-September, before autumn chill sets in. Check thoroughly for pests before bringing back indoors.
Humidity: How Much Humidity Does a Spider Plant Need?
Spider plants tolerate average UK room humidity (40–55%) without difficulty. They are not humidity-dependent in the way that tropical plants like calatheas or orchids are.
Humidity guidance:
- Average UK living room (40–55% humidity): fine without any intervention
- Heated rooms in winter (can drop to 25–35%): may cause brown leaf tips
- Bathrooms and kitchens: naturally more humid — ideal placement
Signs of too-low humidity: Brown, crispy leaf tips, especially in winter when central heating is running.
How to increase humidity affordably:
- Place the pot on a pebble tray filled with water — as the water evaporates, it raises local humidity (ensure pot is not sitting in the water itself)
- Group multiple plants together — they collectively raise the humidity around each other
- Mist the leaves lightly every 2–3 weeks in winter — do not soak; misting in cold, poorly ventilated rooms can encourage fungal issues
- A small humidifier near the plant in winter is the most effective solution if brown tips are a persistent problem
Feeding: How and When to Feed a Spider Plant in the UK
Spider plants benefit from regular feeding during their active growing season (March–September) and minimal feeding during autumn and winter, when growth naturally slows.
Feeding schedule:
| Period | Frequency | Notes |
|---|---|---|
| March–September | Every 10–14 days (with watering) | Full growing season |
| October–November | Every 4–6 weeks | Tapering off |
| December–February | Stop or once only | Risk of salt burn if over-fed |
What type of fertiliser to use:
- A balanced liquid houseplant fertiliser (equal NPK ratio, e.g., 10-10-10 or 5-5-5) is ideal
- Recommended UK brands: Baby Bio Houseplant Food, Westland Houseplant Feed, Miracle-Gro All Purpose Liquid Plant Food, Tomorite (diluted to half strength)
- Avoid high-nitrogen feeds — they promote excessive leafy growth at the expense of roots and spiderettes, and make the plant more susceptible to pests
Signs of over-feeding:
- Brown leaf tips with a yellow halo around them
- White crystalline crust on the soil surface
- Roots with blackened, burned tips when you inspect them
Fix: If you have over-fed, flush the soil thoroughly with 2–3 full watering cans of rainwater or filtered water to dilute and drain away accumulated salts.
Signs of under-feeding (nutrient deficiency):
- Pale, yellowish leaves across the whole plant
- Stunted growth despite good light and watering
- Spiderettes are small and weak

Compost and Repotting: What Soil Does a Spider Plant Need?
Definition: Spider plants need well-draining compost that retains some moisture but never becomes waterlogged. Their tuberous roots are more tolerant of drought than of soggy conditions.
Best compost for spider plants in the UK:
- Peat-free multi-purpose compost with added perlite (20–30% perlite improves drainage significantly)
- Peat-free houseplant compost (slightly richer than multi-purpose — good for established plants)
- Avoid heavy garden soil or coir-only mixes, which can become compacted or waterlogged
UK peat-free compost brands rated for spider plants:
| Brand | Type | Rating | Notes |
|---|---|---|---|
| Westland Peat Free Houseplant | Houseplant specific | ★★★★★ | Excellent drainage and nutrients |
| Miracle-Gro Peat Free All Purpose | Multi-purpose | ★★★★ | Good value, widely available |
| RHS Peat Free Multi-Purpose | Multi-purpose | ★★★★ | Trusted formulation |
| Dalefoot Wool Compost | Specialist | ★★★★ | Excellent water retention and drainage |
| New Horizon Peat Free | Multi-purpose | ★★★ | Good for repotting; widely available |
Why peat-free?
The UK government has phased out peat compost in retail horticulture as part of environmental commitments to protect peatland habitats. All the major UK garden retailers now stock primarily or exclusively peat-free products. Peat-free composts work excellently for spider plants — there is no need to seek out peat-based products.
When and How to Repot a Spider Plant
When to repot: Every 1–2 years, in spring (March–April is ideal).
Signs your spider plant needs repotting:
- Roots growing through the drainage holes
- Water rushes straight through the pot without being absorbed
- Plant has visibly outgrown its pot, looking top-heavy
- Growth has slowed despite good care
- Roots are tightly coiled around the root ball when removed
How to repot — step by step:
- Choose a new pot that is only 2–3cm wider than the current one. Going too large leads to excess soggy compost around the roots, which causes root rot.
- Water the plant 12–24 hours before repotting — moist compost holds together better and reduces transplant shock.
- Prepare the new pot: add a layer of fresh peat-free compost to the bottom.
- Tip the plant gently on its side and ease it from the old pot. If stuck, run a knife around the inside edge.
- Inspect the roots: trim any black, mushy, or dead roots with clean scissors. Healthy roots are white to cream in colour and firm.
- Position the root ball in the new pot so the top sits 2–3cm below the rim.
- Fill around the sides with fresh compost, firming gently. Avoid burying the crown (the point where leaves emerge from the root system).
- Water thoroughly, allow to drain, and place in bright indirect light.
- Avoid fertilising for 4–6 weeks — fresh compost contains enough nutrients.
Pot material — pros and cons:
| Pot Type | Pros | Cons | Best for |
|---|---|---|---|
| Terracotta | Breathable; prevents overwatering; looks beautiful | Dries out faster; heavier | Those who tend to overwater |
| Plastic | Retains moisture longer; lightweight; inexpensive | Can hold too much water if drainage is poor | Forgetful waterers |
| Ceramic | Attractive; good weight | Usually no drainage hole — needs a nursery pot inside | Display only |
| Hanging basket | Shows off runners and spiderettes | Dries out quickly; harder to water | Best look for mature plants |
Spider plants UK Seasonal Care Calendar: Month-by-Month Guide
This is the section no other UK spider plant guide provides. Use this as your year-round reference.
| Month | Light | Watering | Feeding | Other Tasks |
|---|---|---|---|---|
| January | Move to brightest spot | Every 14–21 days | None | Check for pests; avoid cold draughts |
| February | Brightest spot | Every 14–21 days | Resume if growth starts | Watch for new leaves — sign of emerging season |
| March | Brightest spot or move nearer window | Every 10–14 days | Begin feeding (every 14 days) | Check if repotting is needed |
| April | East/west windowsill | Every 7–10 days | Every 10–14 days | Repot if needed; watch for spiderettes forming |
| May | East/west windowsill | Every 7 days | Every 10–14 days | Propagate spiderettes |
| June | East/west windowsill (shade from direct sun) | Every 5–7 days | Every 10–14 days | Move outdoors to sheltered spot if desired |
| July | Sheltered outdoor or bright indirect indoor | Every 5–7 days | Every 10–14 days | Water more if outdoors; watch for pests |
| August | As July | Every 5–7 days | Every 10–14 days | Last good month for propagation |
| September | Move back indoors by mid-month | Every 7–10 days | Reduce to every 3–4 weeks | Check for pests before bringing back inside |
| October | Move away from cold glass | Every 10–14 days | Every 4–6 weeks | Move away from radiators |
| November | Maximise light | Every 14 days | Stop or minimal | Reduce watering |
| December | Brightest available spot | Every 14–21 days | None | Minimal care; check soil before watering |
How to Propagate Spider Plants — 3 Methods Step by Step
What Is Spider Plant Propagation?
Spider plant propagation is the process of creating new, independent plants from the small plantlets (spiderettes) produced by a mature mother plant, or by dividing the root ball during repotting. It is one of the easiest propagation methods in all of houseplant care.
When Does a Spider Plant Produce Babies?
Spider plants typically begin producing runners (stolons) and spiderettes after 12–18 months of maturity. Long, wiry stems emerge from the centre of the crown, producing small white flowers, which then develop into spiderettes at the tips.
Why is my spider plant not producing babies?
This is one of the most commonly searched questions about spider plants. Common causes:
| Reason | Fix |
|---|---|
| Plant too young (under 12 months) | Wait — it will come |
| Insufficient light | Move to brighter indirect spot |
| Plant is root-bound | Repot and resume feeding |
| Overfeeding with nitrogen | Switch to a balanced or low-nitrogen feed |
| Environmental stress (cold, drought) | Stabilise conditions |
Best time to propagate: March to June — the plant is entering its active growing season and cuttings root fastest.
Propagating Spiderettes in Water (Most Popular with UK Beginners)
Spider Plants UK Propagation Guide :
What you need: Clean jar or glass, scissors, filtered or stood tap water, bright windowsill
Step-by-step:
- Select a healthy spiderette: Choose one that is at least 5–6cm tall and has visible root nubs — small brown nodules at the base of the plantlet. If no nubs are visible, leave it a few more weeks.
- Cut the stolon: Using clean scissors, snip the stolon (trailing stem) close to the spiderette. Do not worry about keeping a long section of stolon attached.
- Set up the water vessel: Fill a small jar or glass with filtered water, rainwater, or tap water that has stood for 24 hours. Temperature should be room temperature — not cold.
- Position the spiderette: Place the spiderette in the jar so the root nubs are just submerged in the water, but the leaves are above the waterline. You can suspend it across the rim of the jar with a cocktail stick if needed.
- Place in bright, indirect light: A windowsill that does not receive direct sunlight is ideal. Avoid dark rooms — roots form best with good light.
- Change the water every 5–7 days: Fresh water prevents stagnation and bacterial growth that would rot the cutting.
- Watch the roots grow: Within 2–4 weeks, white roots of 2–3cm will have developed.
- Pot up: Once roots are 2–3cm long, move to a small pot (7–9cm) filled with moist peat-free compost. Keep evenly moist for the first 2 weeks as the plant adjusts.
UK tip: Use filtered water or rainwater rather than straight tap water — starting a cutting in fluoride-rich water can stunt root development.
Propagating into Soil While Still Attached (Highest Success Rate)
What you need: Small pot (7–9cm), peat-free compost, U-shaped wire (or a hairpin), water
Step-by-step:
- Prepare a small pot: Fill a 7–9cm pot with moist peat-free compost. Place it on a stable surface next to the mother plant.
- Identify your spiderette: Choose one with visible root nubs at the base.
- Pin the spiderette to the compost: Without cutting the stolon, bend the spiderette down onto the compost surface and pin it in place using a U-shaped piece of florist’s wire, a bent paperclip, or a hairpin. The base (root nubs) should be in contact with the compost.
- Keep the compost lightly moist: Water the small pot regularly but do not overwater. The spiderette is still receiving nutrients from the mother plant.
- Wait 3–4 weeks: The spiderette will root into the new pot. Test this by very gently tugging the plant — if it resists, roots have formed.
- Cut the stolon: Once firmly rooted, cut the stolon connecting the spiderette to the mother plant.
- Grow on: Treat the new plant as you would any established spider plant.
Why this method works best: The cutting continues to draw nutrients and water from the mother plant while it roots, dramatically increasing success rates compared to cutting it free first.
Division During Repotting (Fastest Way to Get a Large Plant)
What you need: Clean knife or hands, two pots, peat-free compost
Step-by-step:
- Remove the plant from its pot in spring.
- Shake off excess compost so you can see the root structure clearly.
- Identify natural divisions: Large spider plants typically have 2–4 distinct crowns (rosettes of leaves) that can be separated.
- Gently pull or cut apart the root ball along the natural divisions. Use a clean, sharp knife if the roots are tightly bound.
- Pot each division into its own pot with fresh peat-free compost.
- Water lightly and place in bright, indirect light.
- Avoid direct sun and fertiliser for 4 weeks while the plants re-establish.
Best for: Large, mature plants that need refreshing anyway. Produces a sizeable plant immediately, unlike spiderette propagation which takes many months to reach full size.
Propagation Troubleshooting
| Problem | Likely Cause | Fix |
|---|---|---|
| Cutting not rooting after 4+ weeks | Wrong time of year; water not changed; no root nubs present | Propagate in spring/summer; change water weekly; wait for nubs |
| Cutting rotting in water | Leaves submerged; water stagnant; too warm | Trim any submerged leaves; change water every 5 days; move to cooler spot |
| Rooted cutting wilting after potting | Transplant shock (normal) | Keep evenly moist for 2 weeks; avoid direct sun |
| New plant not growing | Too dark; too cold; overwatered | Improve light and warmth; allow compost to dry slightly |
Spider Plants UK Common Problems, Symptoms & Solution
How Do You Diagnose Problems with a Spider Plant?
Spider plants communicate stress through visible changes in their leaves. The key to diagnosis is identifying which part of the leaf is affected and what pattern the discolouration follows.
Brown Leaf Tips — The Most Common UK Spider Plant Issue
What are brown leaf tips on a spider plant?
Brown leaf tips are dry, crispy, brownish discolouration appearing at the very ends of spider plant leaves. This is the single most common complaint among UK spider plant owners.
Causes and fixes:
| Cause | Description | Fix |
|---|---|---|
| Fluoride/chlorine in UK tap water | The most common UK cause. Chemicals accumulate in soil and burn leaf tips. | Switch to rainwater, filtered water, or stood tap water. Flush soil quarterly. |
| Low humidity | Common in winter with central heating running. | Use a pebble tray; move to kitchen or bathroom; mist occasionally. |
| Underwatering | Soil drying out completely between waterings. | Water more frequently; check soil before watering each time. |
| Over-fertilising | Salt build-up from too much feed. | Flush soil with 2–3 litres of clean water; reduce feeding frequency. |
| Direct sun | Leaf scorch starting at tips. | Move to indirect light; use a net curtain on south-facing windows. |
| Natural ageing | Older leaves naturally age and brown at tips. | Normal; trim tips with clean scissors if aesthetically concerning. |
How to trim brown tips: Use clean, sharp scissors. Cut at a slight angle, following the natural tapered shape of the leaf. Cut just into the brown area, not into the green tissue. This maintains the leaf’s natural appearance far better than a straight horizontal cut.
Will the brown tips spread?
If caused by watering issues or water quality, yes — until the cause is addressed. If caused by natural ageing of a single leaf, no. Monitor the plant over 2–3 weeks after making changes. For additional care tips ,”” Gardening know how“ confirms that brown tips are often linked to water quality and suggests using filtered water for spider plants UK.
Yellow Leaves
What does yellowing mean on a spider plant?
Yellow leaves have different meanings depending on which leaves are affected and the pattern of yellowing.
Diagnostic guide:
| Yellow Pattern | Likely Cause | Fix |
|---|---|---|
| Older/lower leaves yellowing | Normal senescence (ageing) | Remove at the base — normal process |
| New leaves yellowing | Overwatering or root rot | Check soil moisture; allow to dry out; inspect roots |
| All-over yellowing | Nutrient deficiency or too little light | Repot with fresh compost; resume feeding; improve light |
| Yellow with green veins (interveinal chlorosis) | Iron or magnesium deficiency | Use a balanced liquid feed with micronutrients |
| Rapid yellowing with soft stem | Root rot | Emergency repot — remove all black/mushy roots |
No Spiderettes or Babies
Why is my spider plant not producing babies?
A spider plant that is not producing spiderettes (babies) is experiencing one or more of the following conditions:
- Age: Plants under 12–18 months rarely produce offsets. Patience is the only fix.
- Insufficient light: Low-light conditions suppress flowering and runner production. Move to a brighter spot.
- Root-bound: A severely pot-bound plant may redirect energy. Repot and resume regular feeding.
- Too much nitrogen: High-nitrogen feeds promote leafy growth at the expense of flowering and spiderette production. Switch to a balanced fertiliser.
- Stress: Cold draughts, inconsistent watering, or recent repotting can temporarily halt runner production.
Drooping or Wilting Leaves
Cause and fix:
| Pattern | Cause | Fix |
|---|---|---|
| All leaves drooping, wet soil | Overwatering/root rot | Allow to dry; inspect roots; repot if roots are rotting |
| All leaves drooping, dry soil | Severe underwatering | Water thoroughly; allow to drain; improve watering routine |
| Mild drooping in winter | Natural semi-dormancy in UK winter temperatures | Normal; reduce watering; do not over-compensate |
| Drooping after repotting | Transplant shock | Keep moist; shade from strong light; wait 1–2 weeks |
White Crusty Deposits on Leaves or Soil
What are white marks on spider plant leaves?
White, chalky, or powdery deposits on spider plant leaves are mineral salt deposits from hard water — particularly common in London, the South East, East Anglia, and the East Midlands, where water hardness is high.
Fix:
- Wipe leaves with a soft, damp cloth using filtered water or rainwater
- Switch to rainwater or filtered water for all future watering
- Flush the compost with 2–3 litres of rainwater to dilute accumulated minerals
- If the white crust appears on the soil surface, this is also salt build-up — repot with fresh compost
Root Rot
What is root rot in spider plants?
Root rot occurs when compost stays waterlogged for extended periods, allowing anaerobic bacteria and fungi to colonise and destroy the root system. It is the most serious condition a spider plant can face.
Signs:
- Mushy, brown or black roots (visible when plant is removed from pot)
- Foul, sour smell from the compost
- Sudden collapse or severe wilting despite moist compost
- Soft, brown discolouration at the base of the stem
Step-by-step treatment:
- Remove the plant from its pot immediately.
- Wash the roots gently under room-temperature water.
- Using sterile scissors, cut away all black, mushy, or foul-smelling roots. Healthy roots are white/cream and firm.
- Allow the root system to air for 20–30 minutes.
- Dust cut surfaces with powdered cinnamon (natural antifungal) or a commercially available rooting hormone with fungicide.
- Repot into fresh, dry peat-free compost in a clean pot with good drainage.
- Water very lightly — just enough to moisten the compost — and do not water again for 7–10 days.
- Place in warm, bright indirect light. Avoid fertilising for 6 weeks.
Prevention: Always ensure the pot has drainage holes. Empty saucers 20–30 minutes after watering. Never leave a spider plant sitting in standing water.
Pests — Identification and UK Treatment Guide
| Pest | What to Look For | UK Treatment | Severity |
|---|---|---|---|
| Spider mites | Fine webbing between leaves; pale stippling on leaf surface; visible when held up to light | Neem oil spray; increase humidity; shower plant to remove mites | Moderate |
| Mealybugs | White, cottony fluff in leaf axils and stem joints; sticky honeydew | Isopropyl alcohol on a cotton bud to each bug; follow up with neem oil | Moderate–High |
| Aphids | Clusters of tiny green/black insects on new growth; sticky residue; distorted new leaves | SB Plant Invigorator spray; insecticidal soap (Provanto); remove by hand | Low–Moderate |
| Scale insects | Flat, brown or yellow bumps on stems and leaf undersides; sticky honeydew | Manual removal with a damp cloth; systemic insecticide (Westland Bug Killer) | Moderate |
| Fungus gnats | Tiny flies hovering around compost; larvae in soil; symptoms on roots | Allow compost to dry between waterings; yellow sticky traps (widely available in UK garden centres); nematodes (Nemasys Fungus Gnat Killer — very effective) | Low |
| Thrips | Silver streaking on leaves; tiny dark insects | Neem oil; remove badly affected leaves; increase humidity | Moderate |
General pest prevention: Inspect plants monthly by checking under leaves and in the crown. Quarantine new plants for 2 weeks before placing near existing plants. Wipe leaves with a damp cloth every 4–6 weeks — a clean leaf surface is a hostile environment for pests.
Where to Place Your Spider Plant in a UK Home:
The best room for a spider plant is one that offers bright, indirect light and moderate humidity. In a typical UK home, this is usually the kitchen, bathroom, or a living room with an east- or west-facing window.
Room-by-Room Placement Guide of spider plants:
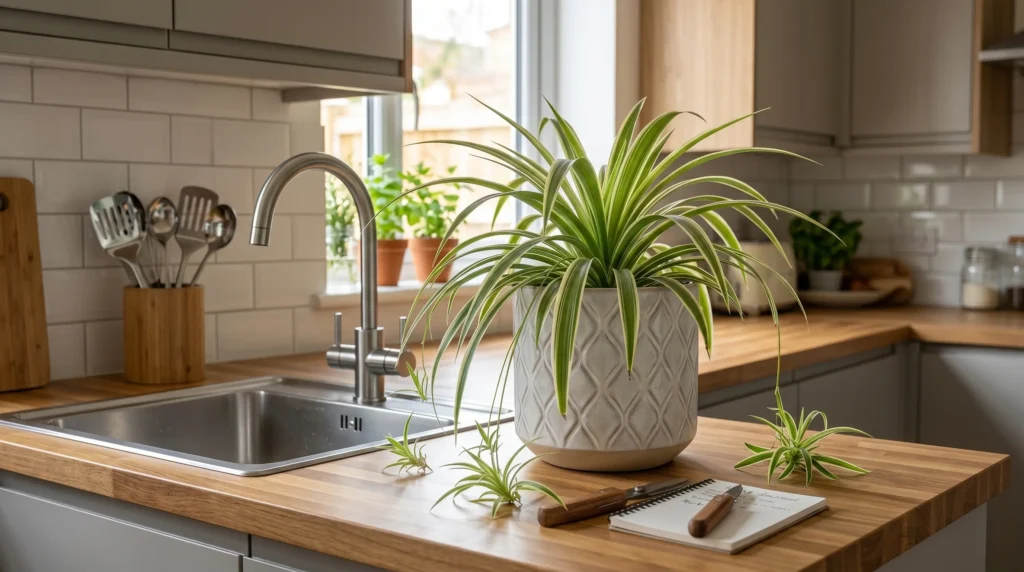
Kitchen (Best option)
- Naturally more humid from cooking and washing up — reduces brown tip risk
- Often well-lit, especially in Victorian terrace kitchens with large windows
- Keep away from the cooker — heat and cooking fumes cause stress
- Position on a windowsill, on top of a cabinet, or in a hanging basket above the sink.
Bathroom (Excellent)
- Humidity from showers and baths is ideal
- North-facing bathrooms (common in UK homes) suit spider plants well — they tolerate the lower light
- Keep away from direct shower spray; wipe leaves if water droplets accumulate regularly
Living room (Very good)
- East or west-facing windows provide ideal indirect light
- Avoid placing directly above or beside a radiator — the warm, dry air promotes brown tips
- A hanging basket or shelf 50–100cm from the window showcases the cascading runners beautifully.
Bedroom (Good)
- Suitable and aesthetically lovely — the cascading leaves work well in bedrooms
- The moderate increase in CO₂ overnight (while you sleep) is absorbed by the plant, though the practical effect is minimal
- North-facing UK bedrooms: consider a grow light in winter months
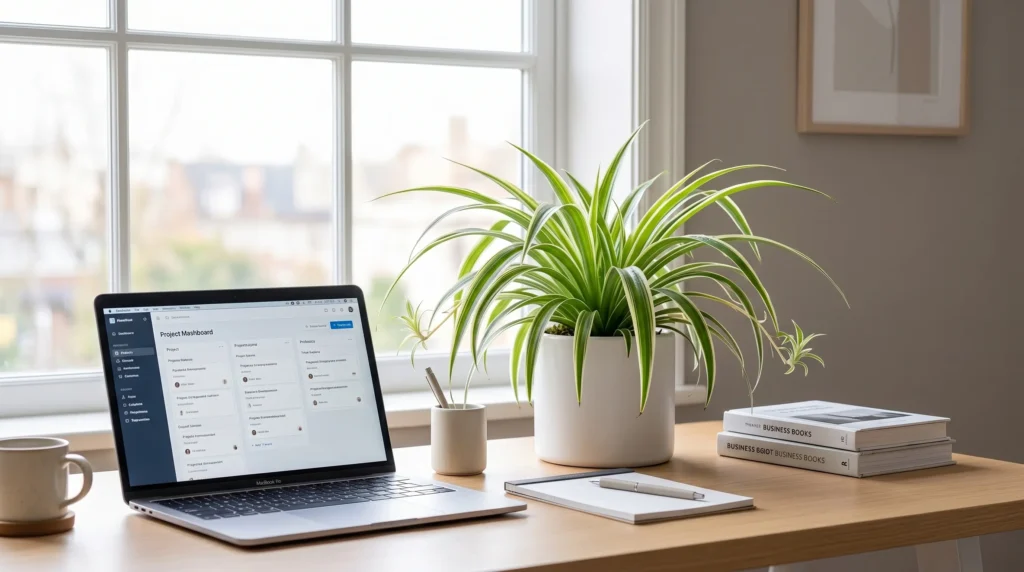
Home office / study (Very good)
- Studies have linked plants in office environments to reduced stress and improved concentration
- Desk-level placement near a window is ideal
- Spider plants produce no allergenic pollen indoors, making them excellent for allergy sufferers.
Hallway (Acceptable)
- Most UK hallways are north-facing and receive low light — use a solid green variety which tolerates this best
- If the hallway receives any natural light, a variegated variety will survive but may lose some stripe intensity
- Cold draughts from front doors are the biggest risk — ensure the plant is not near the entrance
Conservatory (Spring/Summer only)
- Excellent March–September — bright light, warm temperatures, good for producing spiderettes
- Move indoors from October — unheated UK conservatories drop well below the 8°C safe minimum in winter
How to Display Spider Plants: Style Guide for UK Homes
Hanging basket or macramé planter: The classic and most effective display method. Allows runners and spiderettes to cascade freely — this is how a spider plant shows its best feature. Available at virtually every UK garden centre and many high street home stores (IKEA, Dunelm, TK Maxx).
Shelf display: Place on a tall shelf or bookcase, allowing the leaves to cascade over the edge. Works beautifully in living rooms and home offices.
Pot-in-pot: A decorative outer pot (ceramic, woven, or terracotta) with the nursery pot inside. Choose a pot slightly larger to allow air circulation.
Plant grouping: Spider plants combine beautifully with trailing pothos, peace lilies, Boston ferns, and parlour palms — all of which share similar care requirements.
Spider Plants and Air Purification — What the Science Actually Says
Do Spider Plants Clean the Air?
Spider plants do remove certain pollutants from indoor air, but the practical effect in a typical UK home is modest. The research is real — but frequently misrepresented.
The NASA Clean Air Study (1989): NASA scientists tested the ability of various houseplants to remove volatile organic compounds (VOCs) from sealed test chambers. Spider plants were found to remove benzene, formaldehyde, carbon monoxide, and xylene. This study has been cited ever since as evidence that houseplants “purify the air.”
The important caveat: The study was conducted in sealed, controlled chambers with much higher pollutant concentrations than you would find in a UK living room, and with a very high plant-to-air ratio. More recent research (University of Reading, 2022, and multiple peer-reviewed studies) suggests that the number of plants required to achieve meaningful air purification in a typical room is impractically large — estimates range from dozens to hundreds per room.
What spider plants do genuinely offer:
- A small but real increase in local humidity (through transpiration)
- A modest contribution to overall VOC reduction as part of a large collection
- Significant wellbeing, biophilic, and mood benefits — well-documented across multiple UK and European studies
Honest conclusion: A spider plant will not replace an air purifier or open window. But it contributes positively to the indoor environment, looks beautiful, and the psychological benefits of caring for a living plant are very well supported by evidence. That is reason enough to own one.
Spider Plants, Pets and Children — Complete Safety Guide
Are Spider Plants Safe for Cats?
answer: Yes. Spider plants are classified as non-toxic to cats and dogs by the American Society for the Prevention of Cruelty to Animals (ASPCA) and the UK’s Animal Poison Line.
However, there is one important nuance specifically about cats that most guides fail to mention.
Why do cats eat spider plants?
Spider plants contain compounds (specifically opium-related alkaloids) that produce a mild hallucinogenic effect in cats, loosely similar to catnip. This makes spider plants unusually attractive to cats — many cats will seek them out and chew the leaves.
Is it harmful?
The alkaloids are present in very small quantities and are non-toxic. Eating spider plant leaves may cause mild stomach upset, vomiting, or diarrhoea in cats if large quantities are consumed — not because the plant is toxic, but because any unusual plant material can irritate a cat’s digestive system.
Recommendation for cat owners: Keep your spider plant in a hanging basket or high shelf rather than at floor or surface level. This protects both the plant (cats can strip leaves) and your pet (prevents repeated snacking which could cause ongoing digestive upset).
Toxicity comparison between spider plants UK and common UK houseplants:
| Plant | Toxic to Cats | Toxic to Dogs | Toxic to Children | Notes |
|---|---|---|---|---|
| Spider plant | Non-toxic | Non-toxic | Non-toxic | Mild GI upset if large amounts eaten |
| Peace lily | Toxic | Toxic | Toxic | Causes mouth irritation, vomiting |
| Pothos / devil’s ivy | Toxic | Toxic | Toxic | Causes mouth and GI irritation |
| Aloe vera | Mild | Mild | Non-toxic externally | Saponins in leaves cause GI upset |
| Snake plant | Toxic | Toxic | Mild | Saponins — vomiting, diarrhoea |
| ZZ plant | Toxic | Toxic | Toxic | Calcium oxalate crystals |
| Spider plant | Safe | Safe | Safe | One of the safest choices |
Frequently Asked Questions About Spider Plants in the UK
How often should I water my spider plant in the UK?
Water your spider plant when the top 3–5cm of compost feels dry to the touch. In spring and summer this is typically every 5–7 days; in autumn and winter, every 10–21 days. Always check the soil before watering rather than following a fixed schedule — the right frequency varies with your home’s temperature, humidity, and how much light the plant receives. In the UK, winter watering is the most common cause of overwatering-related problems.
Why does my spider plant have brown tips?
Brown leaf tips on UK spider plants are most commonly caused by fluoride and chlorine in tap water, which accumulate in the compost over time and damage leaf tissue. Other causes include low humidity (especially with central heating in winter), underwatering, over-fertilising, and direct sun. Switch to rainwater or filtered water, flush the soil quarterly, and move the plant away from direct heat sources. Trim existing brown tips with clean scissors at a slight angle to restore the plant’s appearance.
Why isn’t my spider plant producing babies (spiderettes)?
Spider plants need to be mature (12–18 months old), growing in bright indirect light, and relatively root-bound to produce runners and spiderettes. If your plant is not producing babies, check: is it getting enough light? Is it being overfed with a high-nitrogen fertiliser? Is it young? Most spider plants produce runners reliably once they settle into good conditions — patience and consistent care are the best approach.
Are spider plants safe for cats and dogs in the UK?
Answer: Yes. Spider plants are classified as non-toxic to cats and dogs. Cats are often attracted to spider plants because the plant contains mild alkaloids similar to catnip. Eating small amounts causes no harm, though large quantities may cause mild digestive upset. Keep the plant out of easy reach of pets to protect both the plant and avoid repeated snacking.
Can I put my spider plant outside in summer in the UK?
Answer: Yes, from June to late August. Move to a sheltered outdoor position with dappled shade or morning sun. Avoid direct midday sun, which will scorch the leaves. Water more frequently outdoors — compost dries faster in wind and heat. Bring back inside before mid-September, before nights drop below 10°C. Check thoroughly for pests before returning to your home.
How do I propagate a spider plant?
Answer: The easiest method is water propagation. Wait until the spiderette (baby plant on a trailing stem) has visible root nubs at its base. Cut it free, place it in a jar of filtered or rainwater so only the nubs are submerged, and position in bright indirect light. Change the water weekly. After 2–4 weeks, roots will be 2–3cm long — pot into peat-free compost. For higher success rates, pin the spiderette into a small pot of compost without cutting it from the mother plant first.
Why are my spider plant’s leaves going yellow?
Answer: Yellow lower leaves are normal — older leaves naturally age and die. If new or mid-plant leaves are yellowing, overwatering is the most likely cause in the UK. Check the soil — if it has been consistently moist, allow it to dry out completely and water less frequently. If yellowing is widespread and pale across the whole plant, it may indicate nutrient deficiency — resume feeding with a balanced liquid fertiliser.
What is the best compost for spider plants in the UK?
Answer: Use a peat-free multi-purpose compost mixed with 20–30% perlite for improved drainage. Good UK options include Westland Peat Free Houseplant Compost, RHS Peat Free Multi-Purpose, and Miracle-Gro Peat Free All Purpose. Avoid heavy, clay-like soils or pure coir, which can become compacted. All major UK garden retailers now stock peat-free products in line with government environmental guidelines.
How big do spider plants grow indoors in the UK?
Answer: In a typical UK home, spider plants reach up to 60cm in both height and spread, taking 3–6 years to reach full size. With runners and hanging spiderettes, the overall cascading spread can be considerably wider. Growth rate depends on light, pot size, and feeding — in a well-lit, well-fed plant, growth is rapid from spring to autumn.
Should I use tap water or rainwater for my spider plant?
Answer: Rainwater is significantly better for UK spider plants. UK tap water contains fluoride and chlorine, both of which accumulate in the compost and cause brown leaf tips over time. Rainwater is naturally soft, fluoride-free, and at ambient temperature. Collect it in a small watering jug from an open window during UK rain. If rainwater is not available, use filtered water (e.g., Brita jug) or leave tap water to stand overnight (this removes chlorine but not fluoride).
How do I get rid of pests on my spider plant?
Answer: Most spider plant pests — mealybugs, aphids, spider mites, and scale insects — can be treated effectively with neem oil spray (mix 5ml neem oil + 2ml dish soap + 1 litre water in a spray bottle; apply to all leaf surfaces weekly for 3–4 weeks). SB Plant Invigorator is a widely available UK product that works against most common houseplant pests. For mealybugs, dab individual bugs with a cotton bud dipped in isopropyl alcohol before spraying. For fungus gnats, reduce watering frequency and use yellow sticky traps or Nemasys nematode treatment.
Do spider plants purify the air?
Answer: Spider plants can remove small amounts of certain air pollutants (including formaldehyde and benzene), as demonstrated in NASA’s 1989 clean air study. However, the practical air-purifying effect in a typical UK home is modest — you would need many plants per room to achieve meaningful air quality improvement. Spider plants do raise local humidity slightly through transpiration and offer well-documented wellbeing benefits. They are worth growing for their beauty and ease, not primarily for air purification.
New to houseplants? Explore our full UK houseplants care guides for more beginner-freindly plants like pothos and snake plants.
Conclusion: Why the Spider Plant Belongs in Every UK Home
The spider plant is a remarkable plant: simultaneously one of the most ancient houseplant favourites in British homes and one of the most relevant for the modern UK plant parent. It is forgiving enough for the busiest household, generous enough to share its offspring with every friend who visits, safe enough for homes with cats, dogs, and small children, and beautiful enough to anchor any room it occupies.The most important lesson for UK growers is the water quality issue.
Switching from tap water to rainwater or filtered water will, more than any other single change, transform the appearance of your spider plant and eliminate the persistent brown tips that most UK owners simply accept as inevitable.Beyond that, the care is genuinely simple: bright indirect light, compost that is allowed to dry partially between waterings, a balanced liquid feed from March to September, peat-free compost when repotting, and a bright windowsill through the winter months.If you have found this guide useful, explore our detailed cluster articles for deeper coverage of each topic:
- Spider Plant Propagation: The Complete UK Step-by-Step Guide
- Spider Plant Problems Solved: A Full Troubleshooting Guide for UK Growers
- Spider Plant Varieties: Every Type Available in the UK Explained
- Best Rooms for Spider Plants in a UK Home: A Room-by-Room Guide
- Where to Buy Spider Plants in the UK: 2026 Retailer Guide
- Spider Plants and Pets: The Complete UK Safety Guide
This article was written for UK plant owners and reflects UK-specific growing conditions, water quality, seasonal patterns, and retail availability as of April 2026. All care advice is based on horticultural best practice and primary sources including the Royal Horticultural Society, ASPCA toxicity database, and current UK retailer information.

Leave a Reply